A final recon before for the KOM attempt this afternoon. A couple of crucial pieces of information I need to know. Where does the Segment start, finish and target times along the way so I know how I am doing.
First of all, where does the Strava Segment start? Using the Street View a myWindsock Marker is placed exactly on the road where the Segment begins.
Secondly, where does the Segment finish? This time using Street View we can see a finishing flag on the road marking the finish.
Along the way I’d like to know how I am doing. By clicking on any point along the myWindsock.com map we can discover data like Elapsed Time. I’ve chosen two key points on the Segment that will give me a good understanding of how I am doing against my time prediction.
Let’s plan tomorrow’s KOM attempt together. Just as I would for a cycling time trial, I am using myWindsock.com to plan and predict my time. Tomorrow I will follow the plan and see how close I can get to the prediction!
In this video I:
Pick the fastest time of day. Changing the time of day alters the predicted time. I gain a few seconds by waiting an hour.
Discover the power I will need to break the current KOM. I estimate that I’d need around 340 Watts to be close to the current KOM.
Predict my time using my expected power values. Entering my anticipated wattage for my attempt at 360 Watts. This beats the current KOM by 30 seconds.
Add junctions into the plan. Two right hand turns means I will have to give way. I am optimistic for no hold ups at the junctions and lose just a few seconds.
Adjust the finishing power for a final big effort to the line. 500 Watts at the finish takes 11 seconds off my time.
My predicted time and target for tomorrow 8:23. Let’s see tomorrow if I can do it!
Hilly intervals today 🚴♂️😀. I’m using hills today to keep the speeds lowish just in case of ice. Don’t worry I’ll creep down the hills.
I’m using the Strava Segment Filter to find the Segments I will use for my intervals. It’s much more motivating for me to do intervals on Strava Segments. Going from A to B is so much more like racing than interval time.
I want to find Segments along my route of around 6-8 minutes, at a power of 360-380 Watts and up hill greater than 3% gradient.
First of all I set the forecast for the time I will be training. I then set the whole ride to use my interval power of 360-380 Watts.
Now the whole ride is using my interval parameters I can then use the filter (top right corner icon) to find only the Segments that meet my training objectives.
It’s been a fun, but long day. I’ve sat through a long seminar, fought my way through Manchester’s traffic and seen some amazing L S Lowry paintings!
But now I just want to relax and see what the weather will be like for the usual club run tomorrow 🚴♂️🚴♂️🚴♂️. I don’t have a preplanned route and I really can’t be bothered making one. Let’s face it plotting routes on route planners is pretty tedious and not a fun Friday night activity.
So fortunately all I have to do is take last Saturday’s ride and change the date. It’s that simple! Watch the video below to see how easy it is for you to view a weather forecast for one of your old Strava Activities.
Now I can wonder all night if -0.2 Celsius is too cold to ride 🤷♂️
Steps taken in video
Make sure you’ve connected Strava. You will be prompted to do so if you haven’t
Click on the Strava Icon from your account dashboard.
Select activity with the route you would like to see a forecast for.
Click the Date Icon at the top of the activity’s myWindsock map.
Select ‘Set Date and Time’ and set to the date of your planned ride
It’s the time of year to set yourself an ambitious target for next season. Ben is going for a sub 50min 25 mile time trial. By using myWindsock.com he discovers the off season training goals he needs to break the 50 minute barrier.
Select your local time trial course here Time Trial Courses and discover the improvements you need to make this off season.
It’s been a while since we have updated you on the latest service improvements. You may have noticed these changes and are already taking advantage of them. Here is a run down of the latest features.
Ride Insights
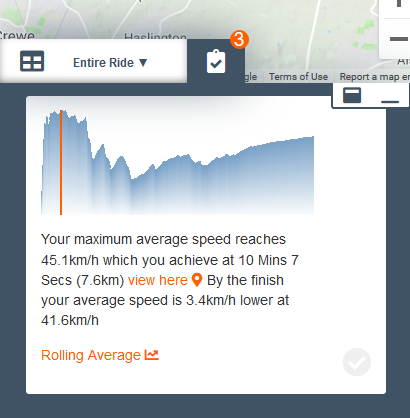
A brand new feature is the Ride Insights tab. From this tab you will find interesting information that our system has discovered about your ride. For example Premium members may find insights to the wattage cost of the headwind up the local climb. Or perhaps how the average speed will change during the ride. Other things you will find in here are actionable suggestions and news.
Data Tab Menu and Auto Selections
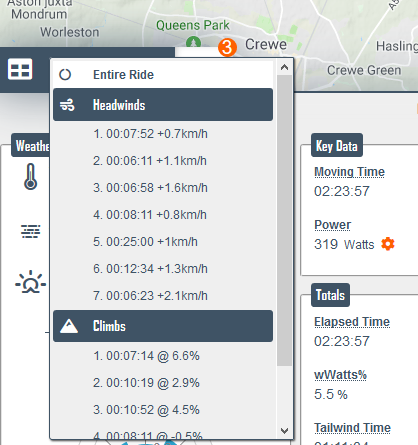
Locating the most interesting and important sections of a forecast is something we wanted improve. Key areas of most rides come down to the climbs and headwinds. So we decided that we would automatically find these for you for quicker analysis. You can find these section in the Data Tab Menu. Also within this menu you can find your created Intervals.
Summary data and charts within the tab reflect the selection you made from the Data Tab Menu.
New Chart Menu System
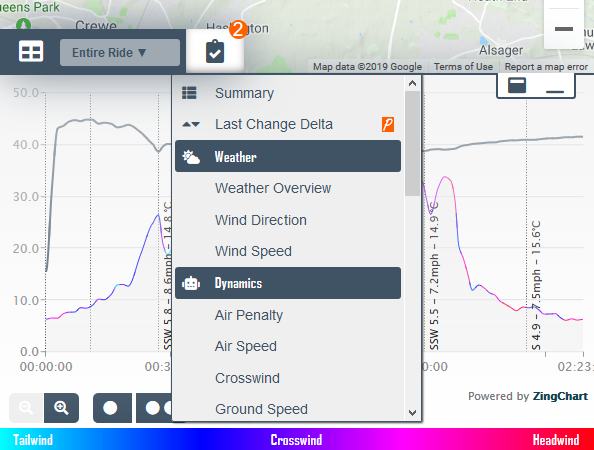
As the Data Tab Menu controls the zoom level of the charts you are viewing we decided that it would be more intuitive to move the Chart menu within the data tab. Click on the current chart title to view more charts.
Interval Parameter Toggle
Some intervals you want to change just the Power or the CdA and keep everything else as default. This is why we made the parameters you can set on an interval optional. When a parameter is active the Virtual Rider will follow the interval’s setting however when unchecked the parameter will follow the default Virtual Riders rules. This provides you with much greater flexibility when experimenting.
For example you may be happy with the power rules set in your Virtual Riders settings however you may want to see what the cost of relaxing your position would have during an interval. Uncheck the Power checkbox to keep the default power rules during the interval.
These are major changes we have recently made. We hope you will have fun using them.
Massive upgrades to report! The new Strava Segment Filter which help you locate key Strava Segments; customise Watts for Segment efforts on Routes; layout improvements for larger screens; and we now auto offset your Wind Lines for improved clarity. Here are the latest updates in more detail.
Segment Filter
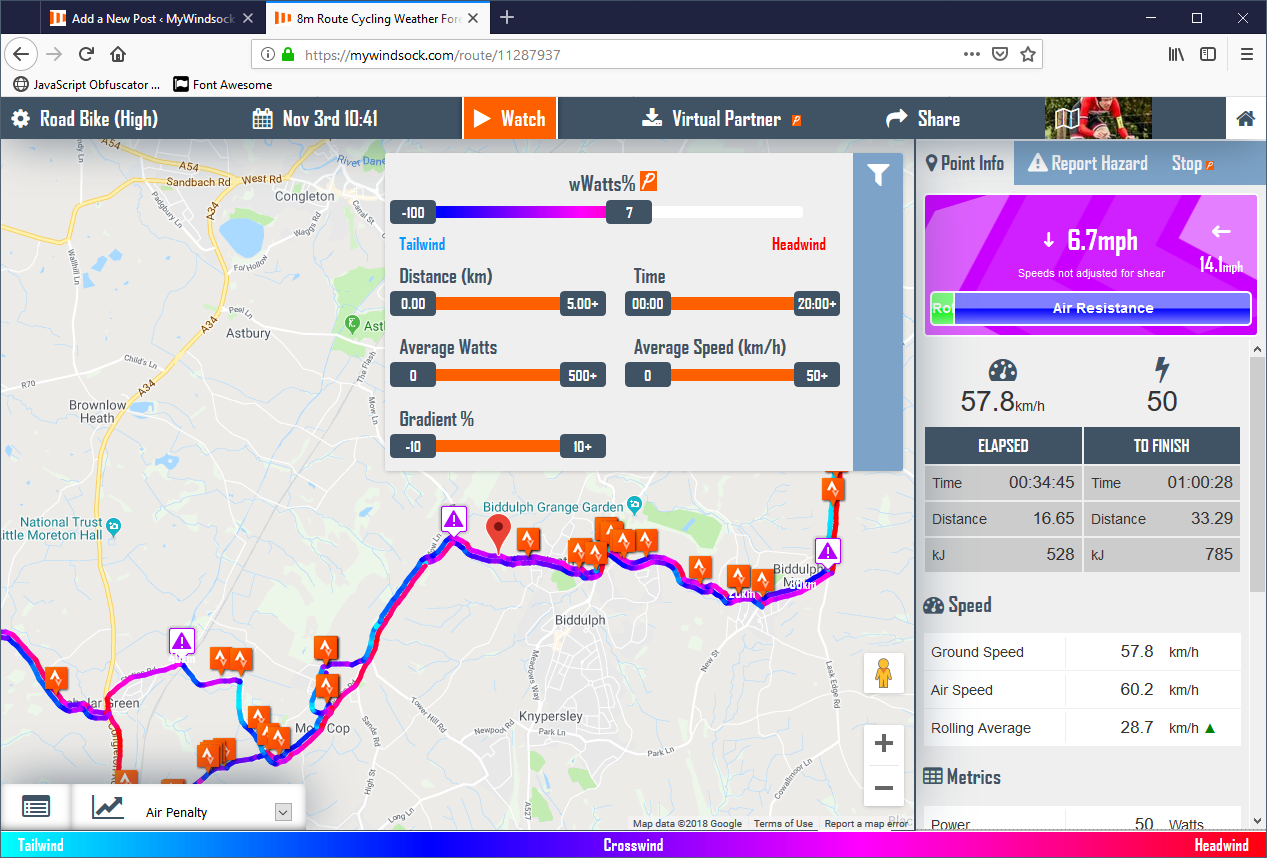
This is a huge upgrade that we are really excited about using. Find the Strava Segments you are most interested in with the new Segment Filter. Available on Routes and Activities, you can now filter Segments based on their calculated..
wWatts% – Premium members can find the most favourable or least favourable segments.
Distance
Time to Complete Segment
Average Watts
Average Speed
Gradient
myWindsock Segment Filter helps you find the most interesting Strava Segments.
High resolution format
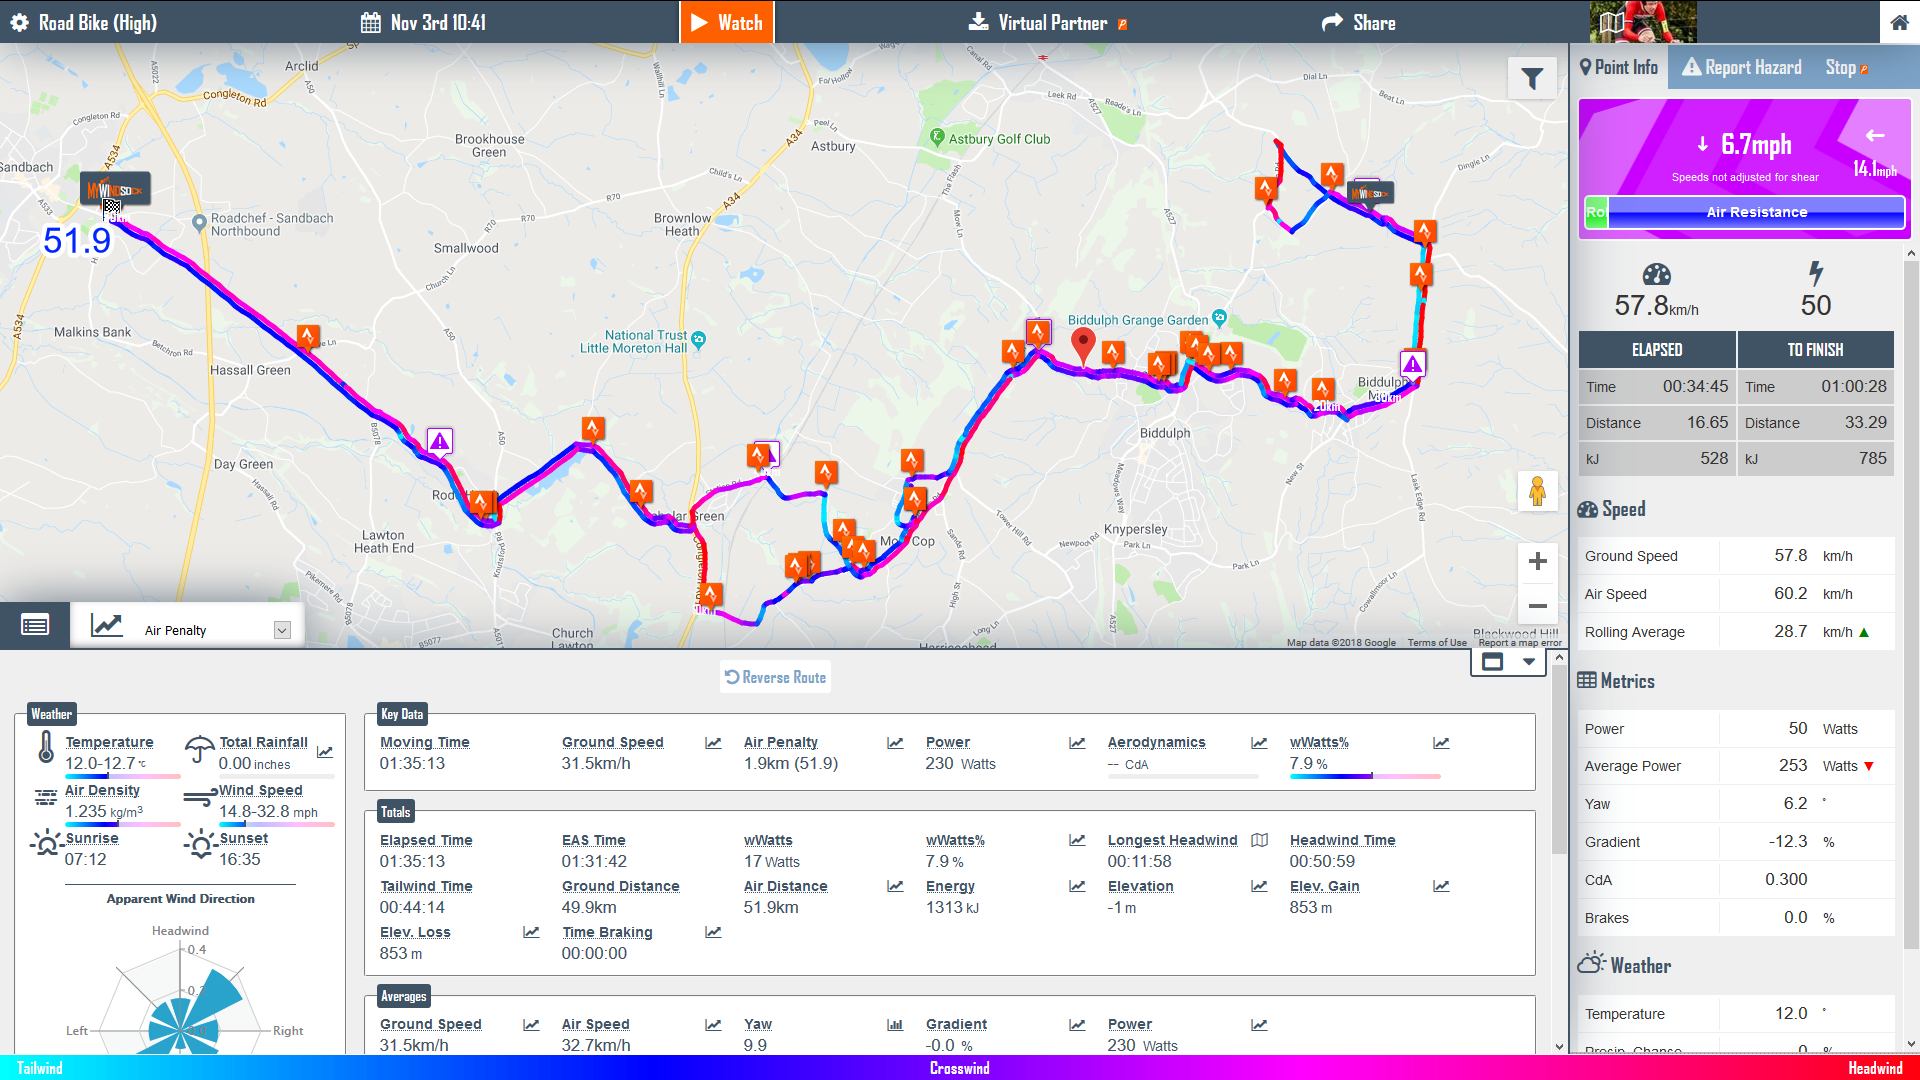
Things were getting a little over crowded with the Point Popup covering the charts, map and data. This isn’t necessary for larger screen sizes so for Tablets, Laptops and other devices with larger screen areas. So on these devices you will now notice that the Point Popup is a Point Sidebar and now lives next to the Map and Data areas.
Point Popup is now a Point Sidebar for larger screens.
Customise Watts and CdA for Strava Segments Efforts
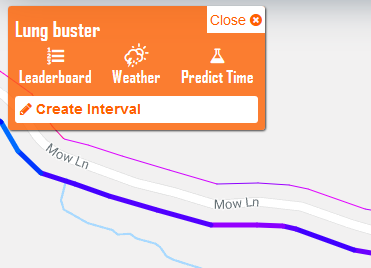
We’ve made it easier to create a custom power plan for your next Route. There is now a Create Interval button when you select a Strava Segment on your Route. Click ‘Create Interval’ to set the Watts and CdA for your Segment effort. Set your target power for your planned Segment efforts for improved pre ride reconnaissance.
Easily customise power by clicking Create Interval on any Strava Segment.
Auto offset of Wind Lines
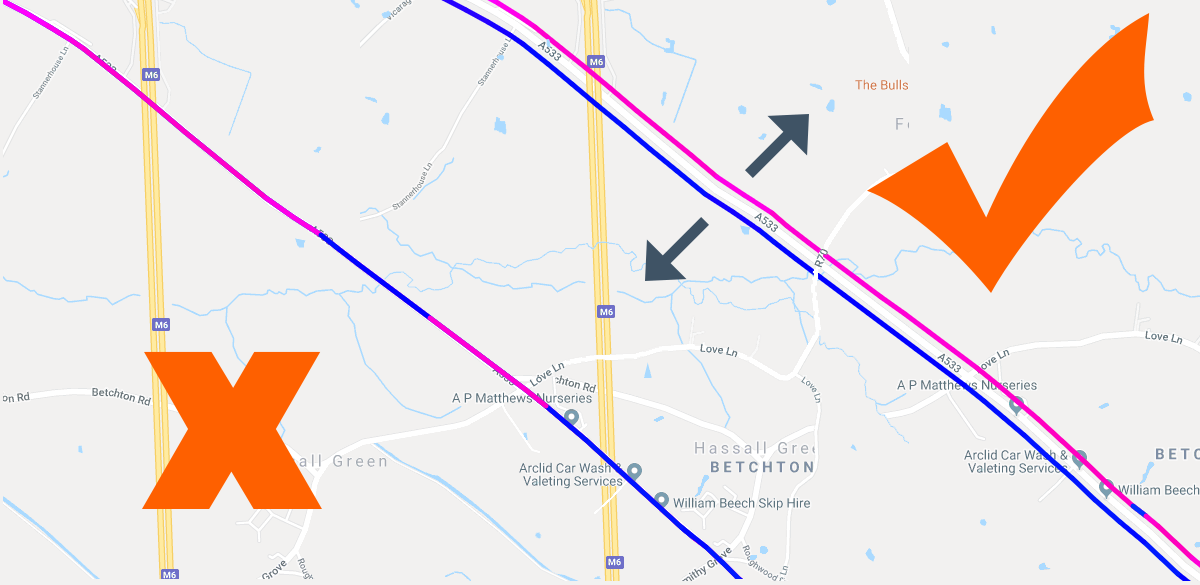
Your Strava Routes and Activities now have a small offset applied to the Wind Lines. This is to help distinguish the Wind Line colours on roads that you ride in both directions.
Wind Lines are now automatically offset to improve visibility.
Bonus upgrade: Course settings are retained from session to session
We were getting frustrated at having to reset our course settings every time we viewed a course forecast. So they are now saved. If you set Offset, Wind Shear or any other course setting you do not have to set it again on your next visit.
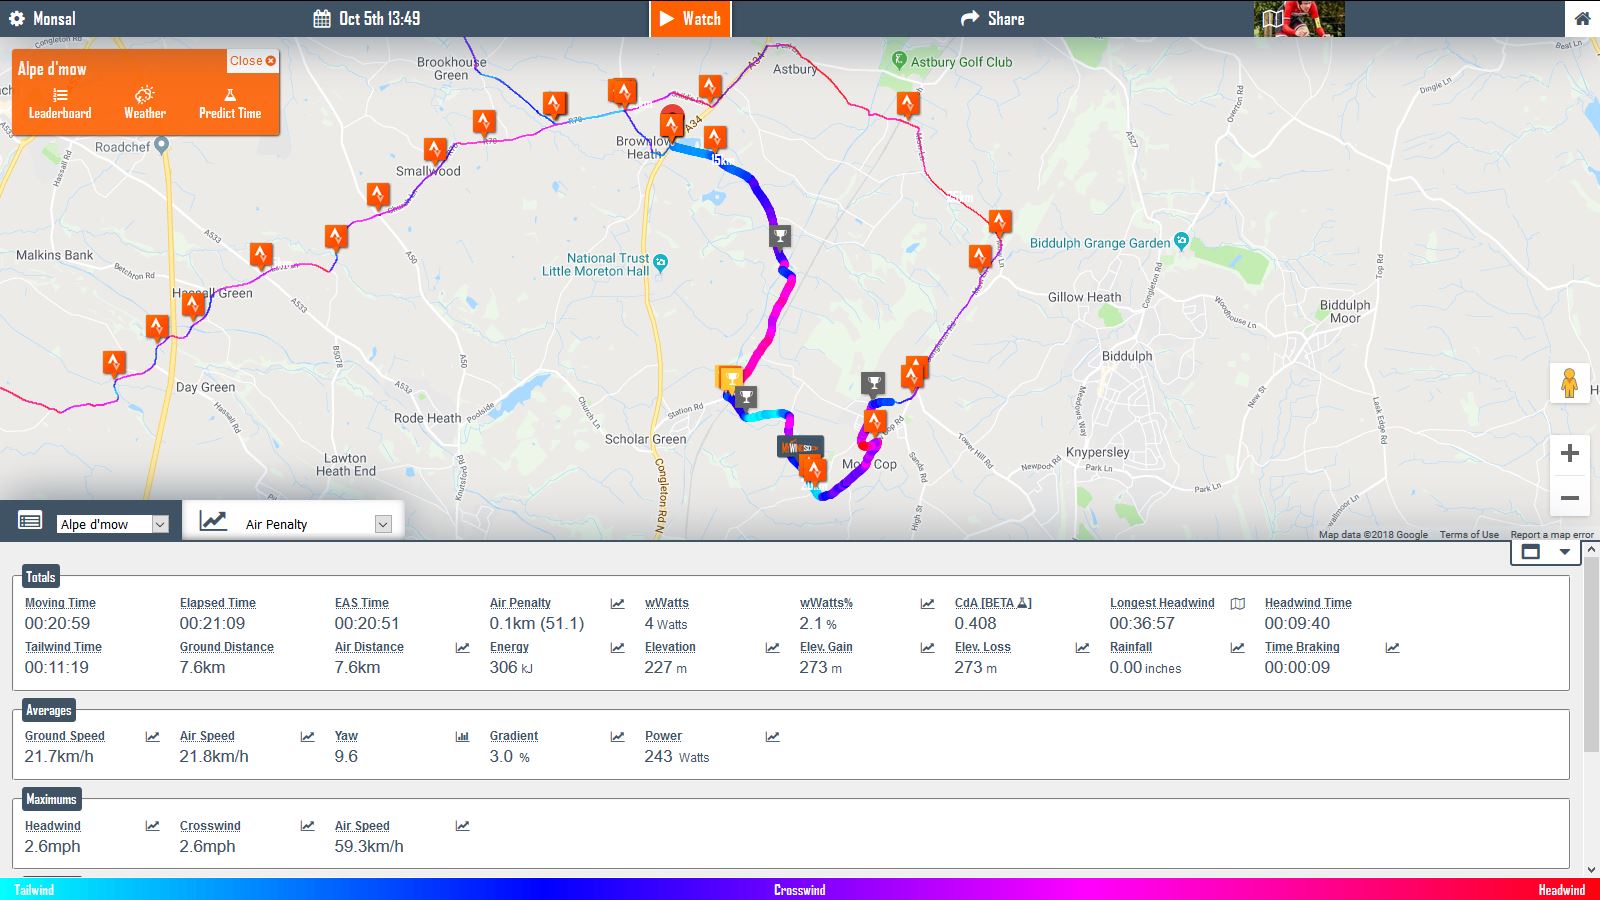
We have been improving how we display Segment information to you on your Strava Activities and Routes. Now clicking on a Segment will reveal the segment myWindsock WindLine and summary information. Charts are also zoomed in to the selected Strava Segment.
View Segments directly on Activities and Routes.
Watch your segment effort
Clicking the Watch button will step you through your effort displaying the prevaillng wind, power, speed and lots more data.
We hope you like this upgrade. We have lots more coming soon!
More features this week. Sit back and relax while viewing the twists and turns of your forecast with Point Player; report and bewarned of hazards on your routes with the Community hazard system and more.
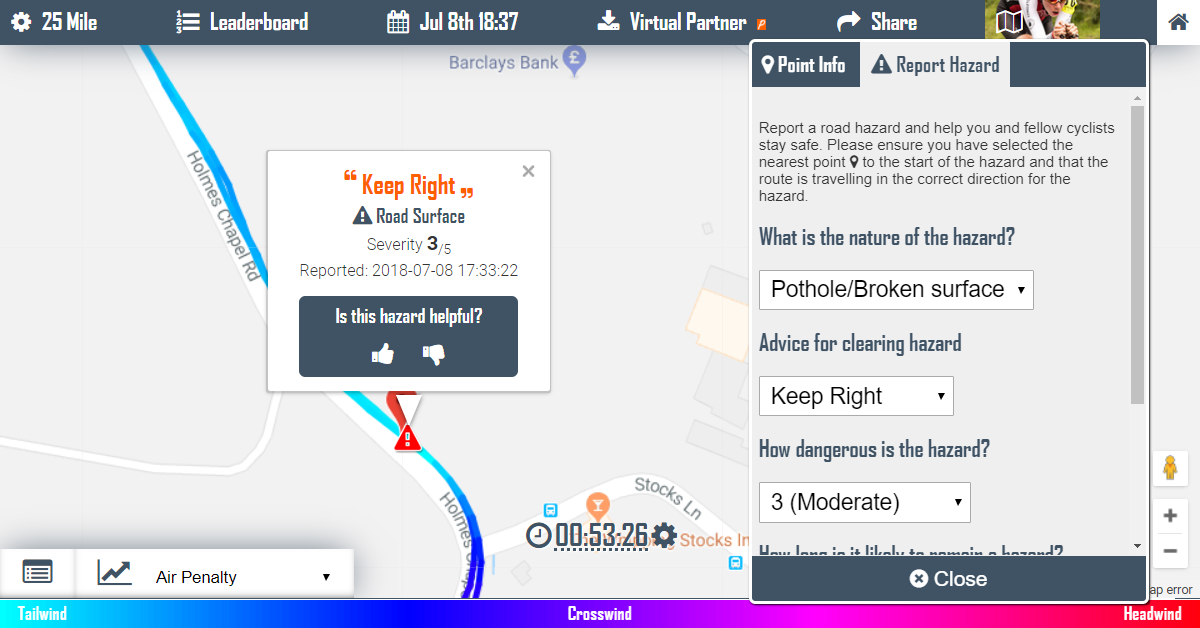
Community Hazard system – this is a big update that we hope you will find useful. It is still being refined so please let us know your thoughts about this new feature either on Facebook or contact us. The idea is that we can share hazards such as potholes on the roads that we ride. Click on any point on your course to reveal the Point Info popup and click the Point Hazard tab to make your Hazard report. You can up vote and down vote hazards by others which will help keep the relevance of hazards high.
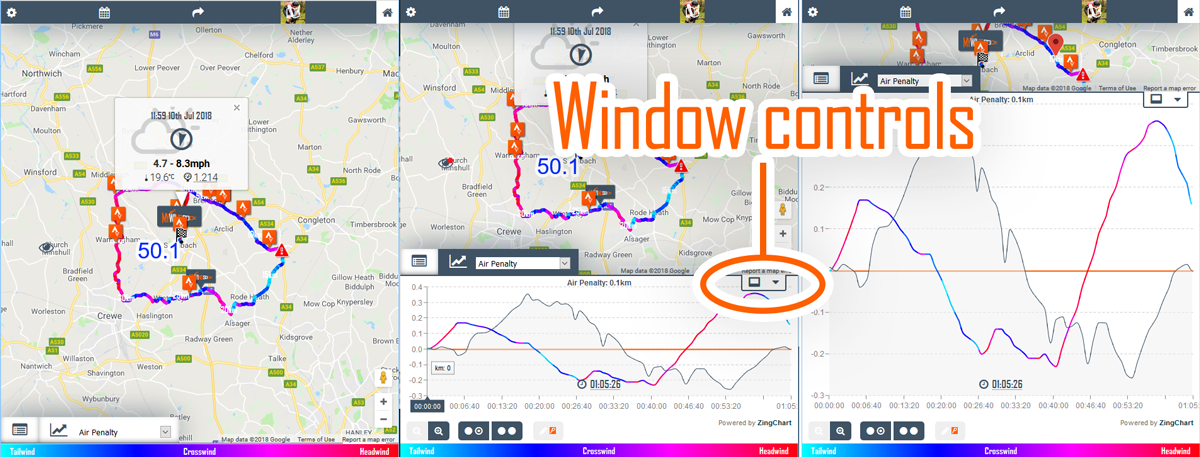
Charts and Data location – On all devices including mobile, desktop and tablet the lower panel which shows charts and overview data, has new options. It has always been possible on desktop to resize the panel however you now have the option on all devices to completely hide show at 1/3rd and 2/3rds height.
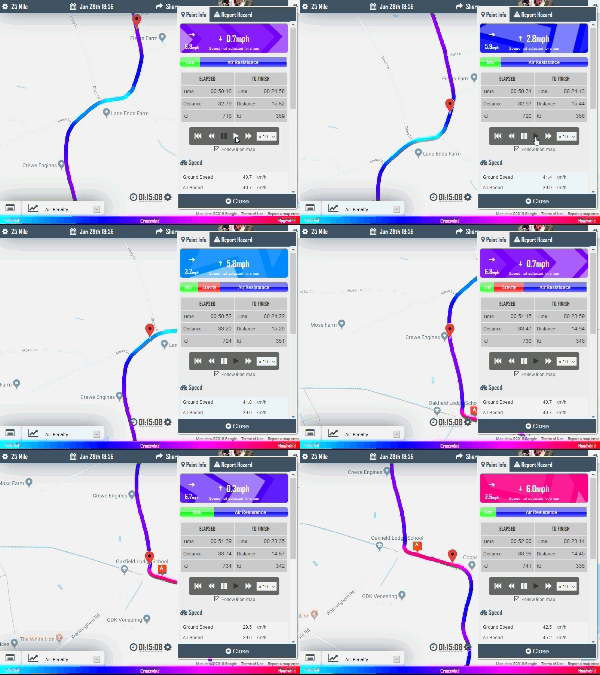
Point Player – It is now possible to sit back and view the twists and turns of your forecast, viewing how your ride develops point by point. This is a Premium feature.
I have some big leaps in functionality for you this week. Including the new Point Info popup that gives you a point by point view of the forecasted conditions and your past performances. Plus a new Chart showing when and how much you braked, plus the option to remove braking points from your CdA calculation.
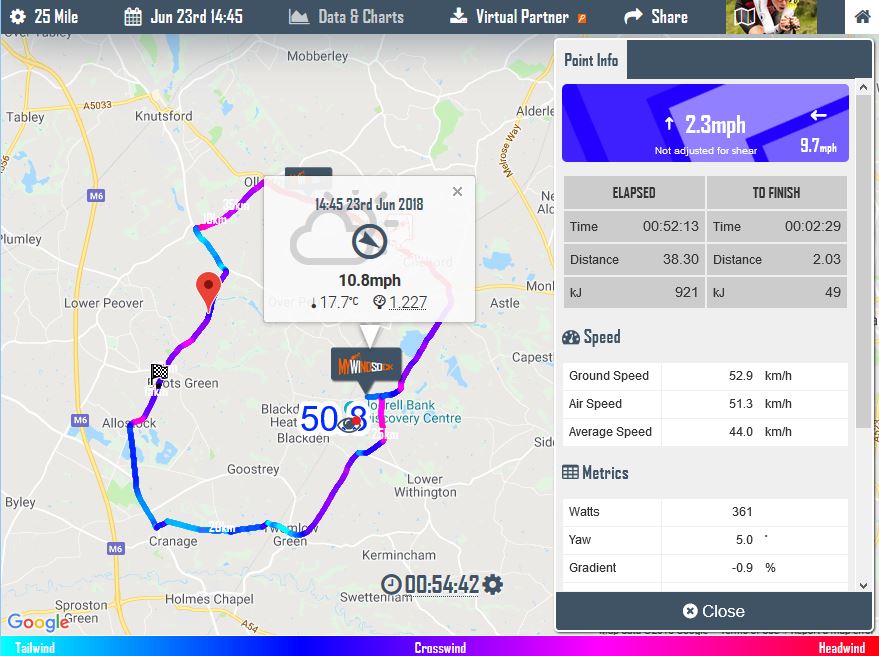
New Point Info Popup – Tapping/clicking any part of your course will activate the Point Info popup. This gives you lots of information for the specific point on the course that you have clicked. Once activate you can move your cursor around the course and view how the conditions and metrics change. The ‘Wind Window’ demonstrates the prevailing wind direction.
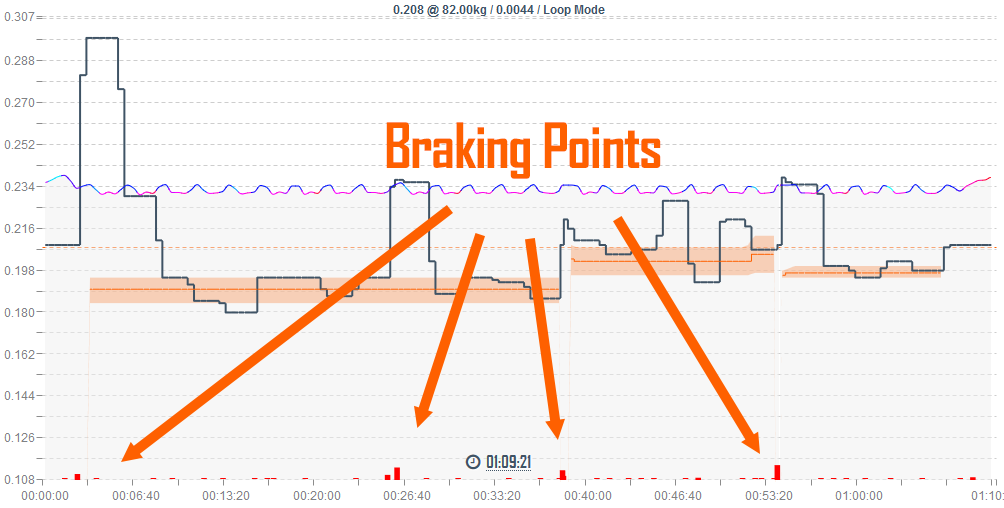
Remove Braking from Loops Mode CdA Calculation. I have enabled this option as default as I believe in most cases it will give the closest approximation of CdA for general riding including time trialing and other forms of racing. I also believe this will actually lead to the retirement of Dirty Mode as an option. I recommend for field testing that the option is deselected as it is useful to isolate your loops that have braking within them so as to provide a clear picture of good loops vs bad loops.
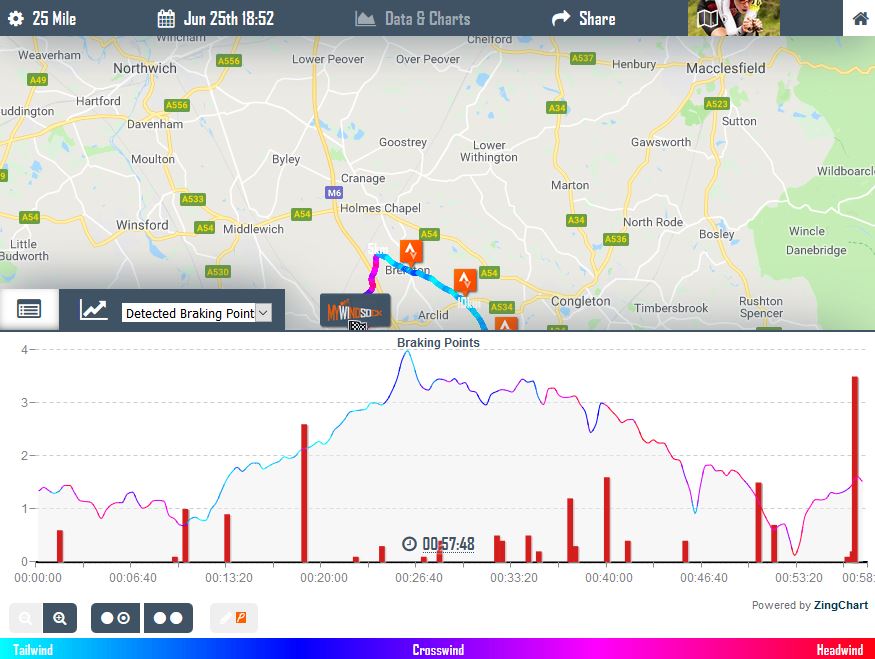
New ‘Detected Braking Points’ Chart. The process of identifying and removing braking from CdA testing has revealed new data that could be useful. Useful if not only to view the success of the Loop mode identifying your known braking points.
Braking Points added to CdA Profile chart. This will help you view which of your loops are possibly affected by braking.
Map Marker Linked with Charts. Moving your cursor around the chart will also show a marker on the map and update the Point Info popup if activated.
Crosshairs on Charts. Charts have greater visual precision with crosshairs coupling time and data.
New ‘Rolling Average Power’ chart. Shows how your average power is progressing during your ride. Usage is similar to that of the Rolling Average Speed.
Leaderboard Bug Fix. Fixed a bug with the Leaderboard Wind Rose where an error would be triggered if Wind Rose hadn’t completed loading when Leaderboard Tabs clicked.

 UK Time Trial Events